Hi, Everyone! Earlier this week I made a post sharing some sewing I had been doing, and I asked my viewers if they'd like to see how I made Gwen's new sundress. I was asked to show you all how, and I decided it would be fun to also include a pattern. This is my very first pattern, so please don't expect perfection. Thanks so much, and let's get started with the patterns themselves!
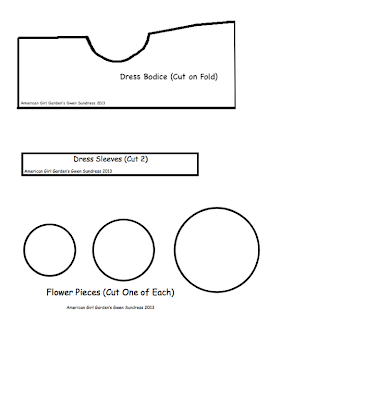
Here are the patterns to the bodice, straps, and a cute flower you can add to the dress! (Note: To give you an idea as to the size, the strap should be 4 1/2 inches wide, and 1/2 an inch tall.)
And here is the dress skirt!
What You Need:
- American Girl Garden's Gwen Sundress Pattern
- Denim or cotton fabric for the bodice (I guess you could use knit if you wanted to).
- Cotton or knit fabric for the skirt (Again, you could also use denim).
- Knit or thin cotton for the flower
- A sewing needle
- Thread
- A marker or pen that can write on cloth
- Pins
Okay, so you'll be starting out with your patterns. This first step may be a bit obvious for you frequent sewers, but first you need to cut out the pattern pieces.
Like so. :)
Next, on the wrong side of the fabric (aka the kind that you won't see), trace the pattern shapes onto the cloth.
This is what it should look like.
Okay, so as you may have noticed, the patterns for the bodice and skirt both say, "Cut on Fold." Do you remember when you were in kindergarten and you could never cut a perfect heart? So instead you folded in in half and only cut half a heart so it would be symmetrical? Yeah, that's what you're doing. :
And that's how it'll look!
(Sorry, I know it says on the pattern to cut on fold, but I changed the pattern a bit since I took these pictures)
Also, if you're making the dress for a Pre-Mattel doll or your hem is pretty big (mine is around 1-3 centimeters, to give you an idea) make sure you trace around the pattern a bit bigger than the pattern actually is, so it won't be too tight. Did that just make sense?
Alright, so now you have all your pieces out! You've only just started. You can do the next instructions in any order for the most part, but here's how I did it. The first thing I did was my least favorite-- hemming! Hemming is useful, however, since it keeps the fabric from fraying and making the article of clothing last longer.
Here are the straps when they're hemmed.
And the bodice, as well!
The joy of making doll clothes out of old mattress covers and clothes is that sometimes it's already hemmed, and that's just the case right here! :)
You can hem the flower if you want to, but since it was knit fabric for me (knit doesn't really fray as bad as woven fabric does), I decided just to leave it as is.
Now you've hemmed everything! This is when we get to the fun part, piecing it all together!
Line up your fabric like this, and then get out your pins! It's time to start making the ruffles! So, pretend you're on Pintrest and pin away! ;)
Okay, so you should stop when the skirt is about the same length as the bodice.
Okay, so now you need to flip over the bodice and start sewing the two parts together.
Also make sure to go over the ruffles in two or more stitches, otherwise it won't look as good.
Once you're done with that, pull out all the pins (unless you did that on the way) and then flip it over. Feel free to take a moment to feel proud of yourself. ;)
Now, it's time to stitch the sides together. Please do not stitch the bodice up, as well!!! Otherwise it will be impossible to get on.
And here's what it should look like once you're done with it!
Okay, now you can sew on the button. It doesn't really matter what side you put it on, just so long as the button hole is on the other side. ;)
Okay, so once you cut the button hole, you can see that the fabric may have already started to fray, so you need to basically go around, using a whip stitch, to prevent fraying.
This is what it should look like once you're done.
Now, you can stop there and just have a cute strapless dress, but I decided to continue on and add some straps to it.
And here's what it'll look like once you sew on the straps! :)
Now for the flower! First, you'll place each circle on top of each other, as seen above.
Next, you'll sew a small circle once or twice around.
After that, tug on the thread until it gets a wavy feel to it, like this.
Finally, before you cut off the thread, sew it onto any place of the dress. I recommend one of the corners.
And then you're finished with the flower! :)
And you're also finished with the dress! Congratulations! :D
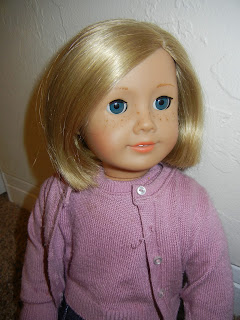
Kirsten is so happy to be in a new dress! She's been in that old pioneer dress for who knows how long!
And now, you're dolls have a great new dress for their last days of Summer!
Well, I hope you all enjoyed that! If you all made the dresses and want to share the pictures, please send them to me at amercangirlgarden@gmail.com, and I can post it on the blog! Thanks for reading!
~Dakota


